As part of the final project of a computer graphic course at university i developed this openGL game. For the most part the game consist of basic computer-graphic techniques which are taken from online resources. Thus i will only explain the parts that i thought of myself and will redirect you to other resources for the other parts.
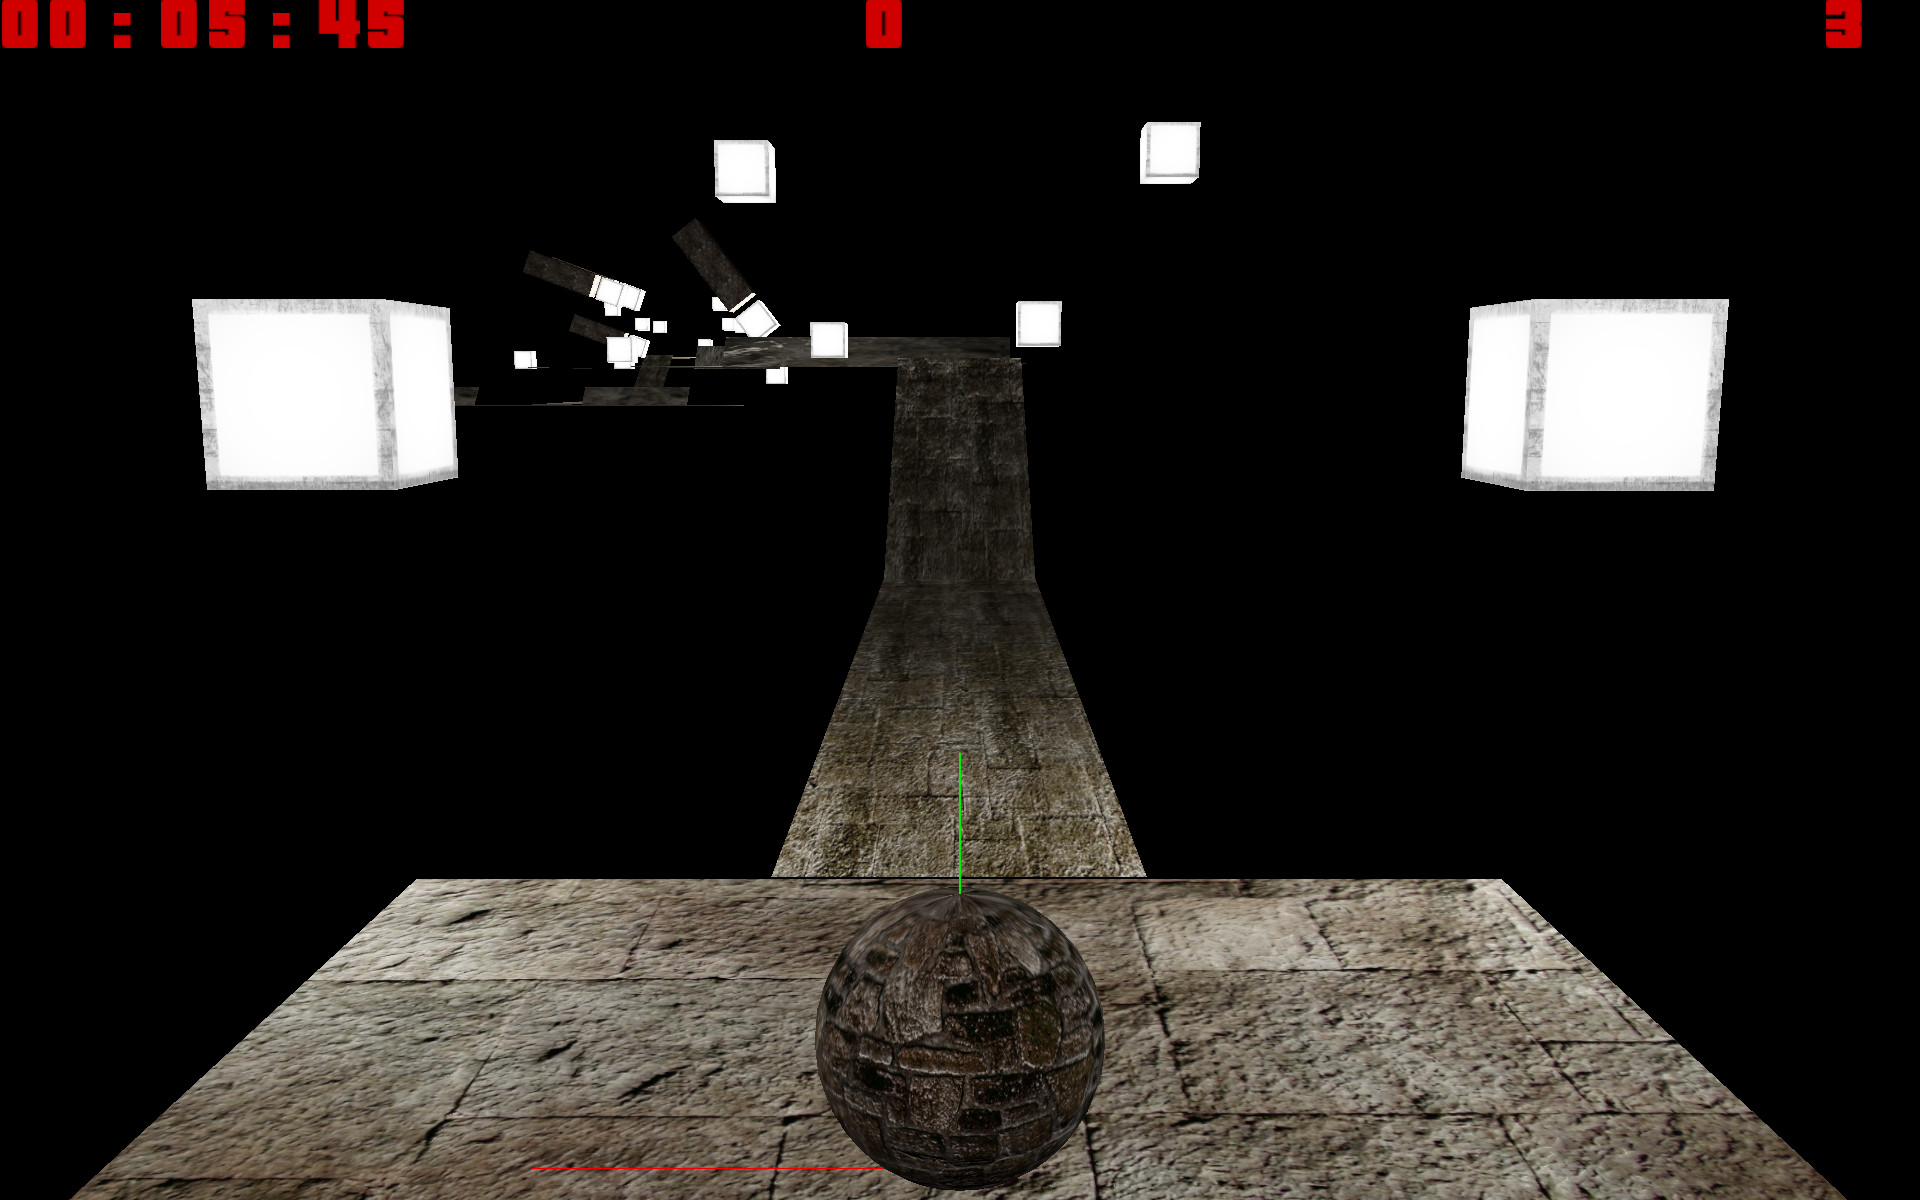
The player controls a sphere that he can move forward, backwards and sideways. Each level is made up of a starting platform and a ending platform as well as obstacle path inbetween both platforms. The player has to use the momentum of the sphere in order to climb steep slopes or jump over long distances.The faster the player is able to reach the end platform the higher his score will be. On each playthrough the player is given 3 lives.
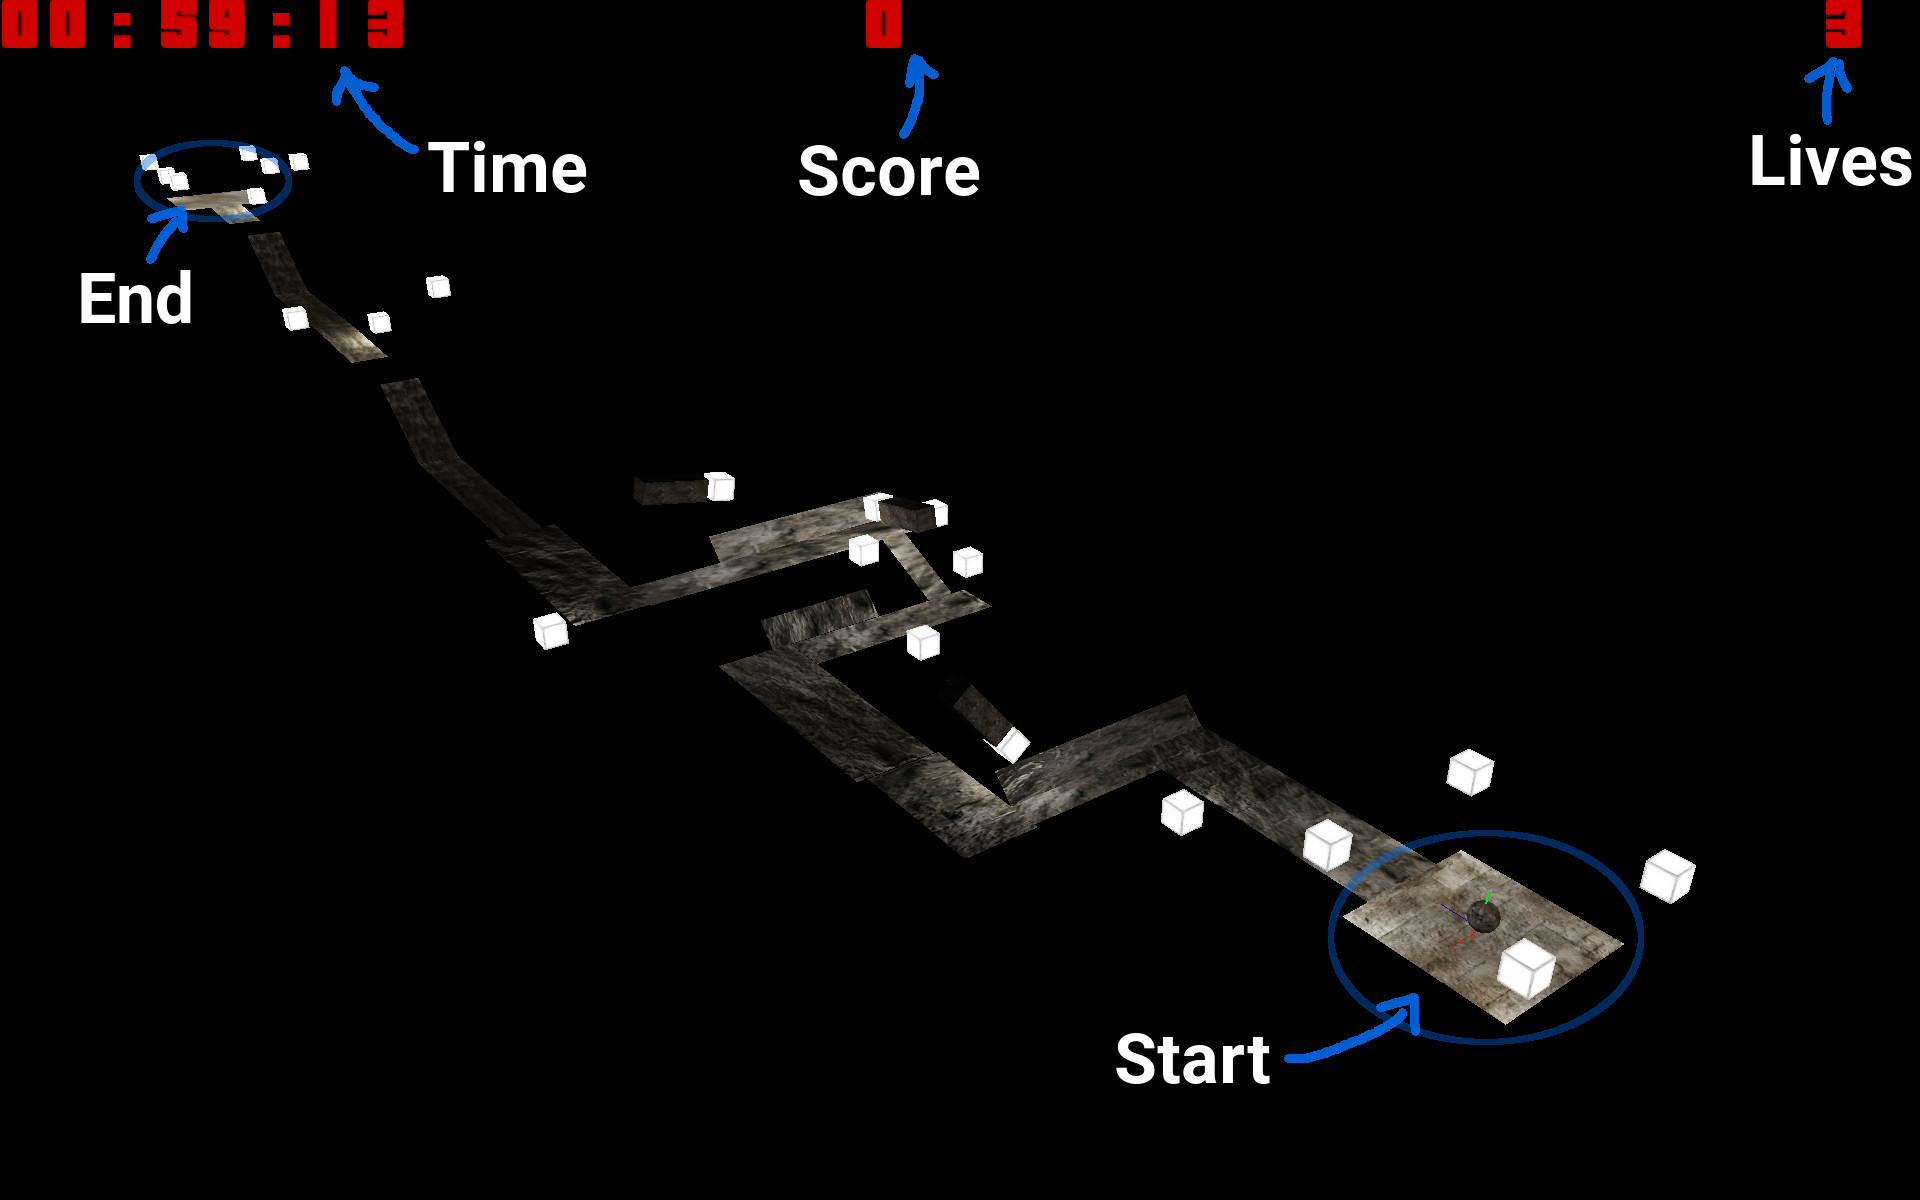
Once the player completes the current level a more difficult level is generated. Both his score and his remaining lives are carried over to this new level. Once the player has used up all his lives he can start over and a level of the initial difficulty will be generated and his score and lives are reset.
As stated in the introduction each level is randomly generated. Well not completely random, appropriate level-segments are placed after each other to form the final level. Each segment contains is defined in a xml-file which information about the contained geometry, collision planes, obstacles, lights as well as some meta information like difficulty of the current segment. Each segment also defines a start and an end point which allows us to place them one after another. So in order to expand the level we need to place a new segment at the end point of the last segment. Since we are using transformation matrices we simply multiply the curPosition with the end position of the new segment.
// retrives a appropriate index
unsigned int choosen =getSegmentIndex();
// instantiates a new segment at the curPosition
segments[choosen].createInstance(curPlacement, pc, getSpeed());
// update curPos so we can place the next segment
curPlacement = curPlacement * (segments[choosen].getNext());
The “getSegment()” function depends on the difficulty of the current level. The difficulty is tracked throughout a playthrough and increased each time the player completes a level by the following definition:
$$dif = dif + (7 / (7 + dif)) $$
This formula insures that the each playthrough starts of with 1 or 2 easy level but but gets more difficult before it gets boring. Yet not still not getting too difficult too quickly. In other words the rating for difficulty is as follows:
When generating a level the difficulty is then mapped to the possible segments with a normal distribution. Since the distribution is clamped at 0 (for indexing) the very first element is chosen more often which means that this should be a very easy segment since the majority of the first level will me made up of this segment. In my case it is just as angled straight road.
The difficulty also increases the speed at which the pendulum obstacles swings, making them harder to avoid and if the player gets hit the impact is stronger making recovery harder or impossible.
Each segment is modeled in blender it may contain collision Planes, lights, meshes and obstacles (i only implemented a pendulum). Everything that is not a mesh has to follow a naming convention in order to be registered correctly. So if we were to create a light source we would have to start it’s name with “light”. Likewise collision planes have to be start with “cPlane” and Pendulum with “Pendulum”. Unlike the other object the pendulum (and other obstacle if i were to make more) need some extra handling in both the code and modeling. So here we only place a “instance” where we want a pendulum to appear. The actual pendulum is defined elsewhere this ensures that all pendulums are equal and that we can actually animate them in the game.
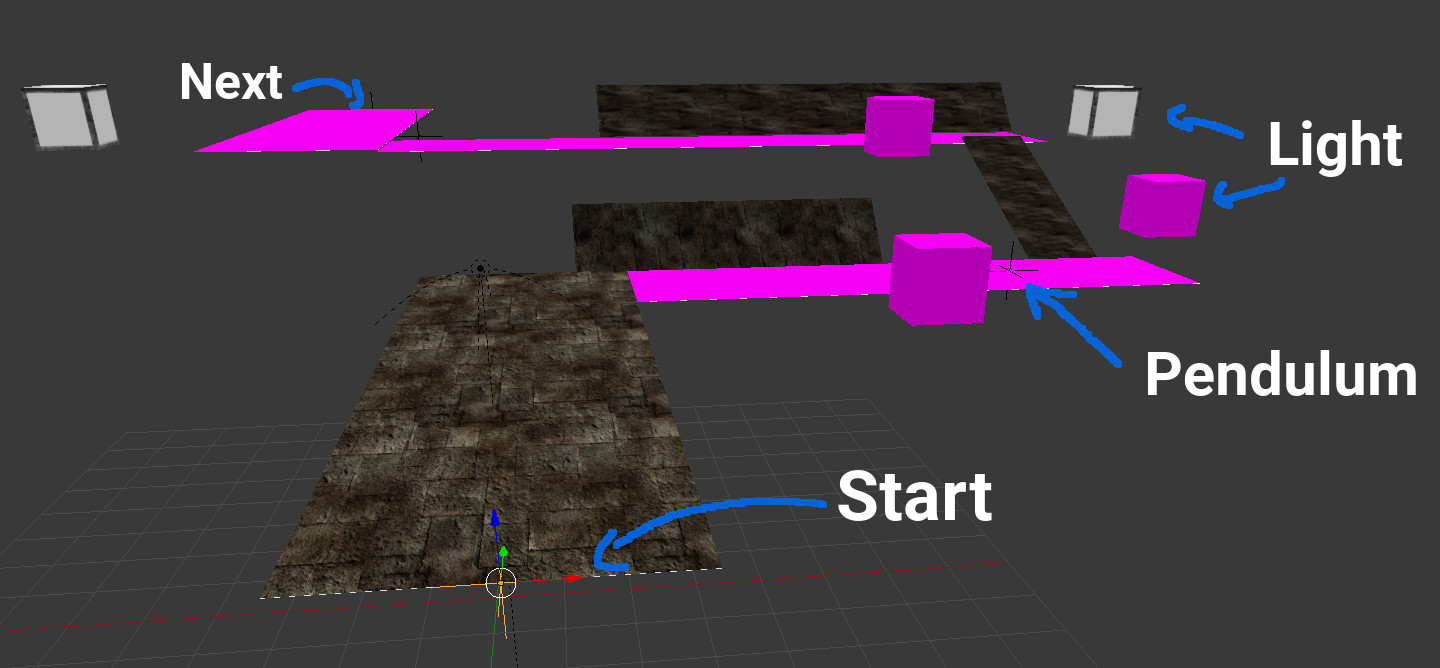
Further each segment-scene has to have to marker where the scene starts with the scene running in the positive y-direction and where the scene ends where the y-direction is where the next scene would start. If you open one of the scenes from the project it should become very clear.
In order to work with the start, end or pendulum markers we not only need the position of the objects but also their orientation. Since most exporter and formats only export the model in objectspace, meaning the file only contains the final position of each vertex rather than the transformation matrix of each model in the scene with their respective transformation matrices i wrote my own export script to do just that. Also this allows me to resolve the naming convention into in the exporter script. As format i choose to use xml since that is fairly easy to import into the c++ application thanks to rapid-xml
In case you want to write your own exporter script for blender my script can be found here.
When importing the scene into the game i faced another challenge. Blender is based on a left-handed coordinate system where as i used a right-handed coordinate system. In order to resolve this transformation i recommend the following article: Converting between Coordinate systems by David Eberly
For the player collision i transform the sphere into the planes coordinate system. Then i check if the y-position of sphere will be within the range of 0 to radius. In other words i check if the next step would result in the sphere going into the plane. Next i check if the spheres-center is within the planes diameter. The biggest downside besides the unnecessary high computation cost is that the method depends on the step size in order to accurately detect collision. If the Player moves more than radius r in one time-step it may very well be possible that he flies through an obstacle.
On impact the forces are redirected depending on the slope of the plane and i added a “bouncyness” factor. You can already see this has nothing to do with actual physics but the results are good enough for the game.
As pointed out this collision does have many drawbacks but at the time of programing i didn’t know anything about physics and this was the best i could come up with using my rudimentary geometric knowledge.
Most of the openGL knowledge was acquired from learnOpenGL a side that i would highly recommend to anyone who is interested in learning openGL.
For example i used a uniform buffer to make relevant light information accessible to all shaders. Further all objects, which are mostly planes, are instanced, even if it probably does not improve performance by much. Actually i think it broke compatibility with intel gpus.
Controls:
| Key | Action |
|---|---|
| arrow | In menu controls |
| enter | In menu choose current |
| WASD | In game movment |
| F4 | lower gamma |
| F5 | increase gamma |
| F1 | debug free cam |
| F2 | buggy directional cam |
Downloads: git-repository, Windows x64 , Linux x64 (coming soon…)